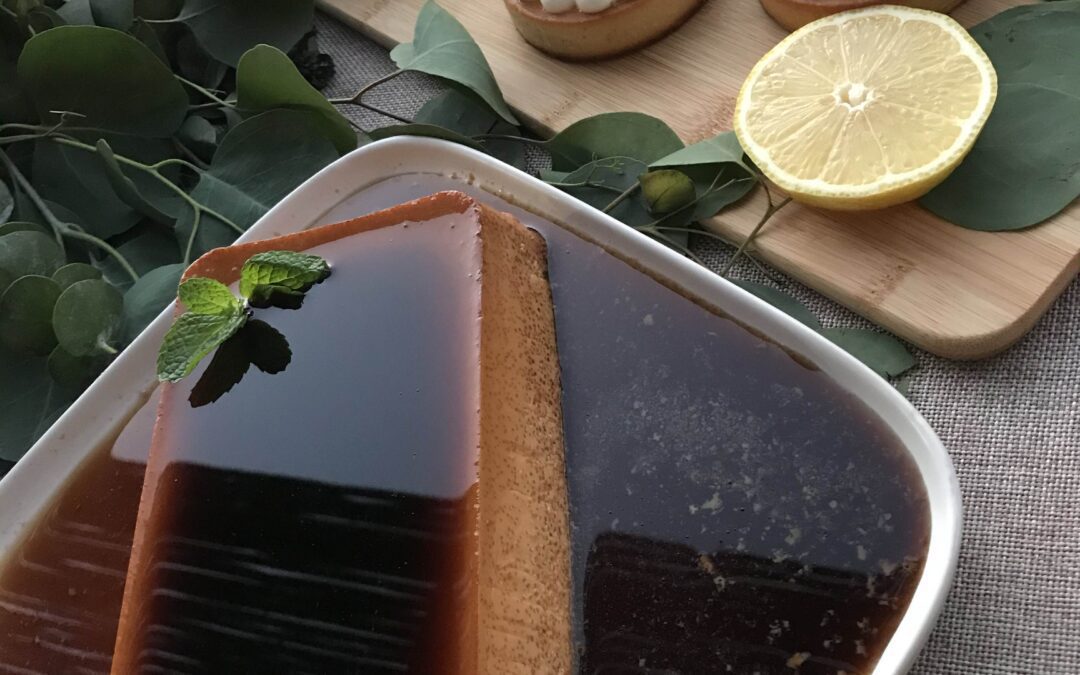
Flan

Flan

A Taste of Tradition: Crafting the Perfect Flan

Step into the world of sweet indulgence with a classic dessert that has stood the test of time – flan. With its velvety texture and caramelized allure, flan is a culinary masterpiece that never fails to delight. Today, I invite you to join me on a journey as we uncover the secrets to creating the perfect flan, one silky spoonful at a time.

The Art of Preparation

Our journey begins with the creation of the golden caramel that will adorn our flan with its irresistible sweetness. In a dance of heat and chemistry, sugar, water, and a touch of lime juice come together to form a luscious syrup. As the mixture simmers and transforms into a rich amber hue, we know that something magical is taking place. With a delicate touch, we pour this liquid gold into our waiting mold, where it will cool and set, ready to embrace the creamy custard that will soon follow.

Now, let’s turn our attention to the heart of our dessert – the main flan mixture. In a symphony of flavors and textures, eggs, egg yolks, vanilla, evaporated milk, rum, sweetened condensed milk, and table cream unite to create a harmonious blend that is as rich as it is decadent. With each ingredient carefully measured and lovingly combined, we set the stage for a culinary masterpiece that will tantalize the taste buds and captivate the senses.

With our caramel-coated mold awaiting its creamy counterpart, we preheat the oven and prepare to bring our flan to life. In a moment of anticipation, we pour the main flan mixture into the mold, where it mingles with the cooled caramel, creating a marriage of flavors that is nothing short of divine. As we carefully place the mold in a water bath and cover it with foil, we know that something special is about to happen. With the oven as our ally, we let our flan bake to perfection, allowing the gentle heat to coax out its creamy essence and transform it into a dessert worthy of the gods. After an hour of patient waiting, we remove the flan from the oven, its surface set and its aroma filling the air with promises of sweet delight. With a sense of satisfaction, we let it cool, knowing that the best things in life are worth waiting for.
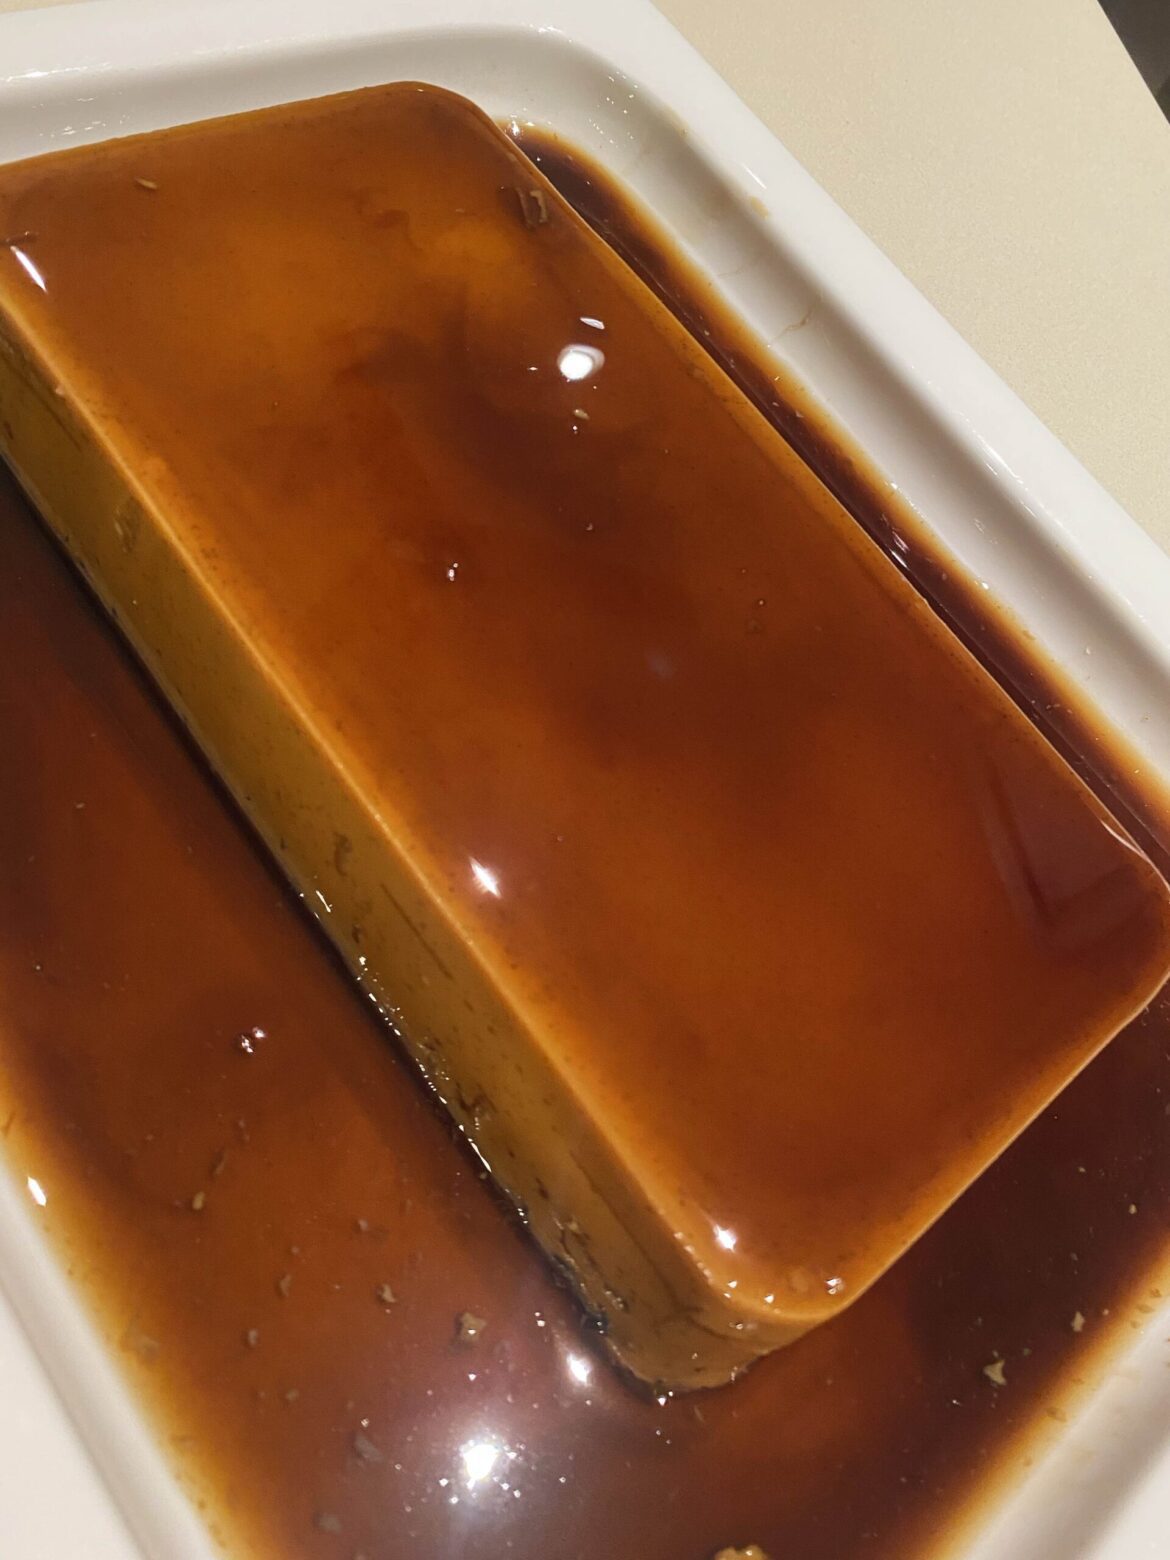
Flan

Cook Time 1 minute
Total Time 1 minute

Ingredients
  

Ingredients:

  • o 240g white sugar
  • o 6 tablespoons of water
  • o Juice of half a small lime

Main flan mixture:

Ingredients:

  • 4 eggs.
  • 3 egg yolks.
  • 60 g vanilla.
  • 1 teaspoon vanilla paste.
  • 330 g evaporated milk Carnation brand.
  • 40 g rum.
  • 375 g sweetened condensed milk.
  • 200 g table cream.

Instructions
 

Caramel:

    Instructions for the caramel:

    • Mix everything together in a saucepan over low heat and let it simmer until the sugar dissolves and turns a light amber color.
    • Pour the caramel into a 22.8x15.7 mold and put it in the freezer to cool.

    Main flan mixture:

      Instructions: (Best prepared a day in advance)

      • Preheat oven to 350°F.
      • In a bowl, mix everything together.
      • Pour the mixture into the caramel-lined mold.
      • Place the mold in a water bath and cover it with aluminum foil. Bake for 1 hour at 350°F.
      • Once it sets, remove from the oven and let it cool.

      Perfect Flan with Love and Tradition

      Finally, the moment we’ve been waiting for has arrived. With a confident flip of the mold, we release our flan from its caramel embrace, revealing its silky smooth texture and golden hue. With each spoonful, we savor the creamy richness of the custard and the sweet kiss of caramel, transported to a realm of culinary bliss that only flan can provide.

      In conclusion, crafting the perfect flan is a labor of love – a testament to the beauty of simple ingredients and the power of tradition. So, whether you’re sharing it with loved ones or indulging in a moment of solitude, I encourage you to savor every bite and appreciate the magic that happens when sugar, eggs, and a touch of rum come together in perfect harmony.

      Are you interested in learning more?

      Follow topics related to recipes on our newsletter or instagram.

      Join our

      Newsletter

      To stay in the loop, we invite you to sign up for our newsletter. By doing so, you will receive regular updates straight to your inbox, keeping you informed of everything Mo.Bo. Cabo has to offer.

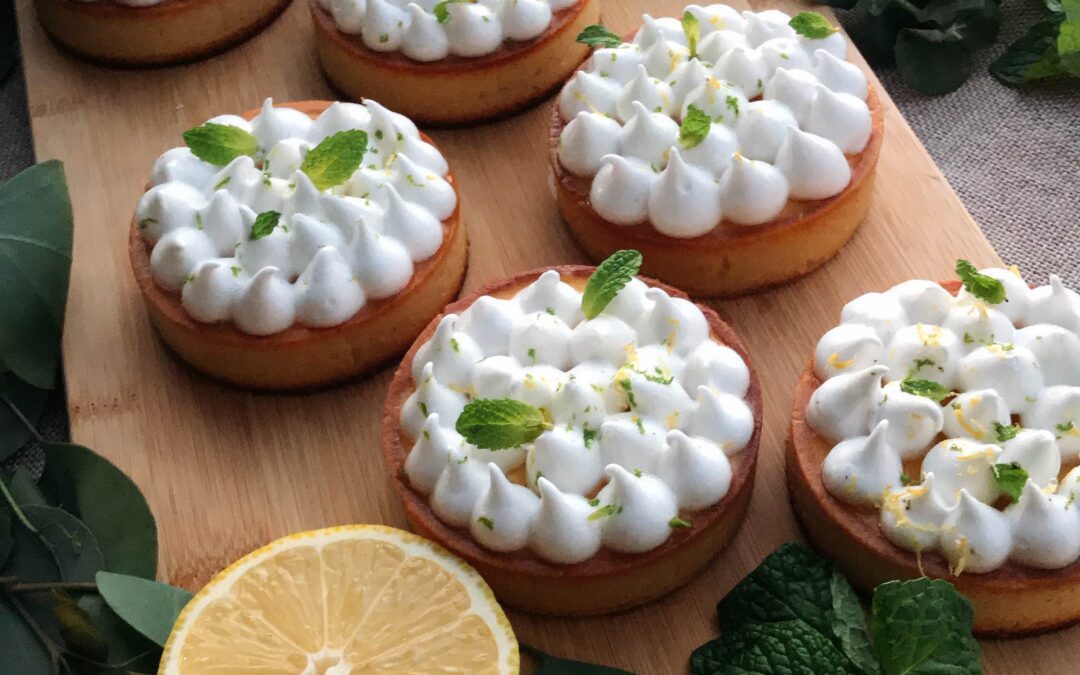
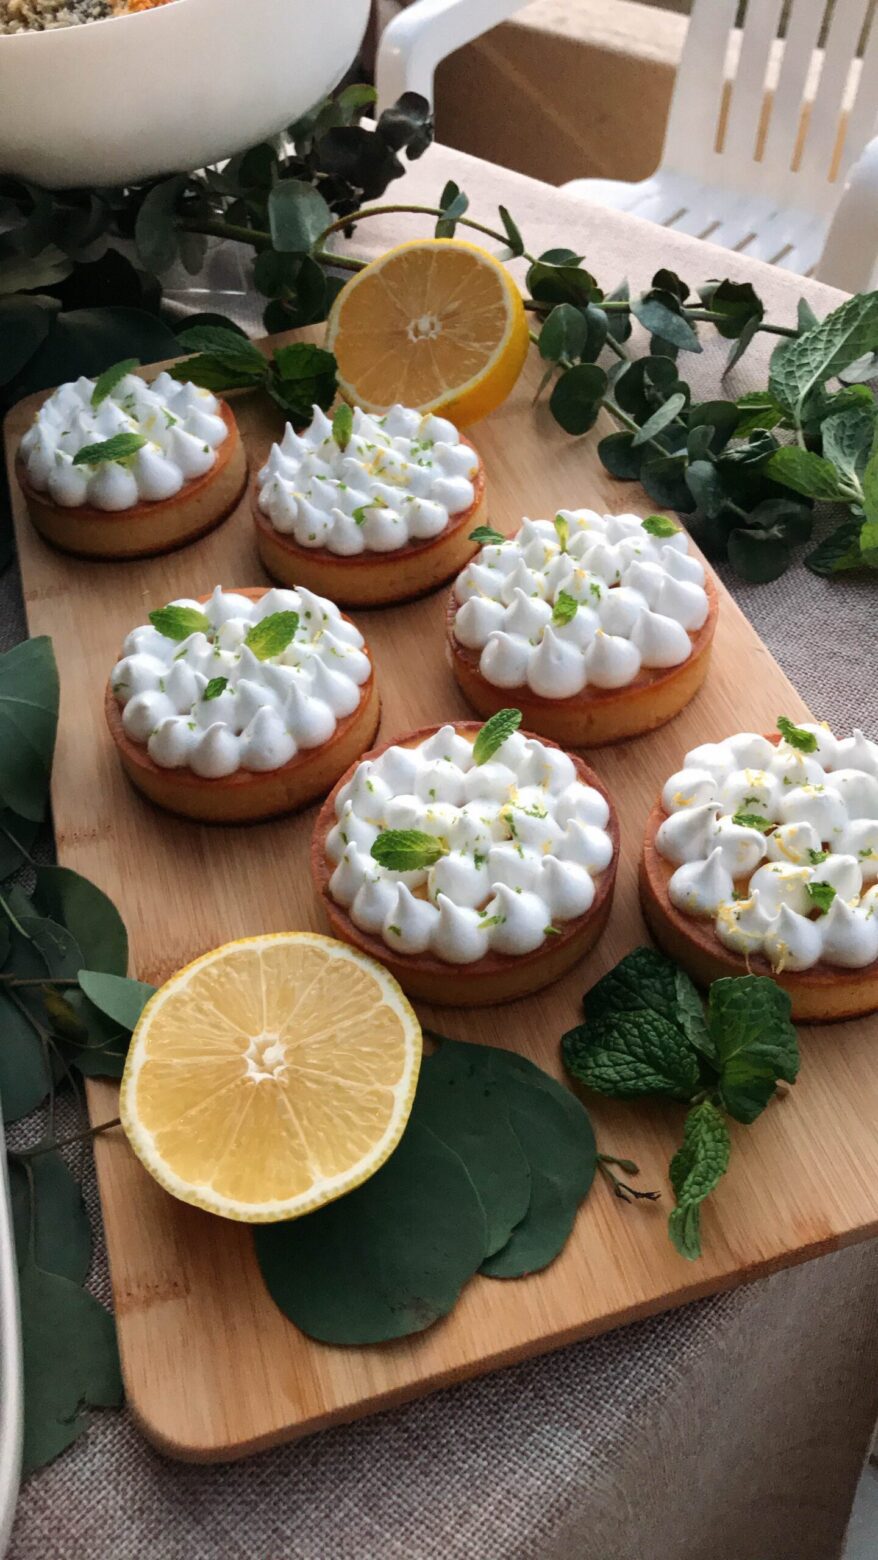
      Lemon Tart

      Lemon Tart

      Indulge in Citrus Bliss: Crafting the Perfect Lemon Tart

      Picture this: a delicate shortcrust pastry cradling a luscious lemon filling, crowned with clouds of Italian meringue and dotted with vibrant red berries. This, my friends, is the epitome of citrus indulgence – the Lemon Tart.

      The Art of Preparation

      Every great tart begins with a solid foundation, and ours starts with a meticulously crafted shortcrust pastry. We blend wheat flour, icing sugar, almond flour, and a pinch of salt, then work in grated cold butter until it resembles fine sand. A whole egg and a hint of lime zest bring the dough together, creating a canvas for our zesty masterpiece.

      With our pastry prepped, it’s time to set the stage for baking brilliance. We roll out the dough, gently coaxing it into a tartlet mold, then prick it with a fork to prevent any unwanted puffiness. After a brief stint in the oven at 374°F, our pastry emerges golden and crisp, ready to cradle our lemony delight.

      As our pastry cools, we dive into the heart of our creation: the tantalizing lemon filling. We whisk together egg yolks, whole eggs, lemon and lime zest, and a generous pour of citrus juice, infusing the mixture with vibrant flavor. Slowly simmered to perfection, this concoction thickens into a velvety custard, enriched with cold butter for an extra touch of decadence. Chilled until set, our lemon filling awaits its moment in the spotlight.

      But what’s a tart without a touch of drama? Enter the Italian meringue, a show-stopping finale to our citrus symphony. We whip up a sweet syrup, while simultaneously beating egg whites to fluffy perfection. With precision timing, we pour the syrup into the frothy whites, transforming them into glossy peaks of meringue magic. Each dollop is a work of art, destined to adorn our tart with elegance and flair.

      With all the elements in place, it’s time for the grand finale: assembly. We lovingly spoon our lemon filling into the awaiting pastry shell, its sunny hue a promise of the citrus bliss to come. On goes the crown of Italian meringue, each swirl and swoop a testament to our pastry prowess. A scattering of red berries adds a final flourish, a burst of color against the creamy backdrop.

      Lemon Tart

      Cook Time 12 minutes

      Ingredients
        

      Shortcrust Pastry:

      Ingredients:

      • o 240g wheat flour.
      • o 95g icing sugar.
      • o 90g almond flour.
      • o Pinch of salt.
      • o 120g grated cold butter.
      • o 1 whole egg.
      • o Lime zest.

      Lemon Filling:

      Ingredients:

      • o 4 egg yolks.
      • o 3 eggs.
      • o Zest of 1 lemon.
      • o Zest of 1 lime.
      • o 150g lime juice.
      • o 150g sugar.
      • o 80g cold butter.

      Italian Meringue:

      Ingredients:

      • o 250g white sugar.
      • o 60g water.
      • o 40g lime juice.
      • o 5 egg whites.

      Instructions
       

      Shortcrust Pastry:

        Preparation:

        • Sift all the dry ingredients.
        • Beat the grated cold butter until it resembles sand.
        • Add the egg and mix until just combined, do not overbeat. Do not work the dough, as it cannot be heated.
        • On baking paper, roll out the dough into a square shape.

        Baking:

        • In a tartlet mold, spread the dough to a thickness of 1 centimeter and prick it with a fork to prevent it from inflating. Also, place some weight in the center.
        • Bake at 374°F for 12 minutes.

        Lemon Filling:

          Preparation:

          • Mix sugar, eggs, zest, and juice. Bring to a simmer over low heat.
          • Cook the mixture until it thickens, stirring constantly to prevent the egg from scrambling.
          • Once thickened, remove from heat. Let it cool slightly and add the cold butter.
          • Cover with cling film, making sure it is in contact with the surface of the filling, and refrigerate.

          Italian Meringue:

            Preparation:

            • Cook over low heat until the sugar dissolves.
            • While the sugar is dissolving, beat the egg whites in a mixer at speed 4.
            • Both processes should be ready at the same time.
            • When the syrup is ready, pour it in a thin stream from one side of the mixer into the egg whites, increasing the speed to 6-8.
            • Stop the process when the meringue looks shiny and has a pearly appearance.

            Assembly:

            • Once the short crust pastry has cooled, pour in the lemon filling. Decorate with Italian meringue and place some red berries on top.

            Epilogue: A Taste of Sunshine

            As the curtain falls on our lemon tart extravaganza, there’s only one thing left to do: indulge. With each bite, you’ll taste the bright tang of citrus, the buttery richness of pastry, and the ethereal sweetness of meringue. It’s a symphony of flavors, a celebration of craftsmanship, and a reminder that sometimes, the simplest pleasures are the sweetest.

            So, dear reader, why not treat yourself to a slice of sunshine? Whip up a lemon tart, pour yourself a cup of tea, and savor the taste of citrus bliss. After all, life is too short not to indulge in a little sweetness now and then.

            Are you interested in learning more?

            Follow topics related to recipes on our newsletter or instagram.

            Join our

            Newsletter

            To stay in the loop, we invite you to sign up for our newsletter. By doing so, you will receive regular updates straight to your inbox, keeping you informed of everything Mo.Bo. Cabo has to offer.
            Red Velvet

            Red Velvet

            The Tale of Our Irresistible Red Velvet Cake

            In the heart of our kitchen, where flour dust dances in the sunlight and the scent of cocoa hangs in the air, a masterpiece is born. It begins not with a mere list of ingredients but with a symphony of flavors waiting to be conducted by skilled hands. Allow me to lead you through the enchanting journey of creating our heavenly Red Velvet Cake, a delight that tantalizes the taste buds and warms the soul

            The Art of Preparation

            Our journey commences with the delicate dance of ingredients for the luscious icing. As the velvety smoothness of Philadelphia cream cheese embraces the warmth of room temperature butter, a union of indulgence is formed. With precise care, we introduce melted white chocolate, a cascade of sweetness that melds effortlessly into the creamy embrace. A whisper of vanilla paste adds a final touch, infusing the icing with a fragrance that promises delight with every bite.

            Next, we venture into the realm of cake-making, where precision meets passion to create layers of perfection. In the heart of a preheated oven, our canvas awaits, adorned with parchment paper and a kiss of butter to ensure a flawless release. The stage is set as we blend the finest ingredients: flour, cocoa powder, baking powder, baking soda, and a pinch of salt, sifted together to form the foundation of our masterpiece. In a separate melody, we blend sour cream, vanilla extract, and a vibrant hue of red food coloring, a nod to the signature allure of Red Velvet. As butter, sugar, and oil whirl in harmony, we slowly add the dry mixture, allowing each note to blend seamlessly before introducing the liquid chorus. With each beat of the mixer, eggs join the melody, binding the composition together into a harmonious blend of flavors.

            As the aroma of freshly baked cake fills the air, our creation emerges from the oven, a vision of scarlet splendor. With patience and reverence, we allow the layers to cool, their tender crumb eagerly awaiting the final flourish. With a gentle hand, we slice each layer in half, revealing its innermost secrets, ready to be adorned with the creamy embrace of our earlier creation.

            In a delicate ballet, we spread generous dollops of icing upon each layer, a testament to the artistry that resides within our kitchen. With a flourish of creativity, we adorn the cake with a cascade of decorations, each one a reflection of the passion and dedication poured into its creation.

            Red Velvet

            Cook Time 45 minutes
            Total Time 45 minutes

            Ingredients
              

            Icing:

            Ingredients:

            • o 90g room temperature butter.
            • o 540g Philadelphia cream cheese.
            • o 300g melted white chocolate.
            • o 1 tablespoon vanilla paste.

            Cake:

            Ingredients:

            • o 240g sour cream.
            • o 300g flour.
            • o 80g cocoa powder.
            • o 1 teaspoon baking powder.
            • o ½ teaspoon baking soda.
            • o 2g salt.
            • o 1 tablespoon red food coloring.
            • o 1 tablespoon apple cider vinegar.
            • o 80g vanilla extract.
            • o 1 2/4 cups brown sugar.
            • o 4 eggs.
            • o 200g butter.
            • o 145g natural oil.
            • o 60g shot of coffee.

            Instructions
             

            Icing:

              Preparation:

              • Melt white chocolate in a double boiler over low heat.
              • In a mixer, cream Philadelphia cream cheese and room temperature butter.
              • Once Philadelphia cream cheese and butter are incorporated, add melted chocolate. Add vanilla paste.

              Cake:

                Preparation:

                • Preheat oven to 350°F.
                • In 20-centimeter diameter and 5-centimeter height pans, place wax paper on the bottom with a little butter.
                • Mix all dry ingredients and sift.
                • In a bowl, mix vinegar, sour cream, vanilla extract, and food coloring.
                • In a mixer, mix butter, sugar, and oil.
                • In equal amounts, add the dry mixture and liquid mixture to the mixer. Once everything is mixed, pour the eggs slowly.
                • Once the mixture is ready, pour in equal parts into the pans.
                • Bake at 350°F on the middle rack for 40-45 minutes, until a toothpick comes out clean.
                • Let cool and unmold. Store in plastic wrap and refrigerate. Rest overnight.
                • Cut horizontally in half and add icing to each layer in piles.
                • Decorate as desired.

                A Symphony of Senses

                As the final embellishments are placed upon our masterpiece, we invite you to partake in the symphony of senses that awaits. With each forkful, savor the velvety richness of the cake, the creamy indulgence of the icing, and the lingering warmth of vanilla and chocolate. Let each bite transport you to a realm of pure delight, where every flavor is a note in a melody composed just for you.

                In our kitchen, where dreams are spun from flour and sugar, our Red Velvet Cake stands as a testament to the art of indulgence. Join us in savoring the magic that unfolds with each slice, and allow yourself to be swept away by the allure of our decadent creation.

                Are you interested in learning more?

                Follow topics related to recipes on our newsletter or instagram.

                Join our

                Newsletter

                To stay in the loop, we invite you to sign up for our newsletter. By doing so, you will receive regular updates straight to your inbox, keeping you informed of everything Mo.Bo. Cabo has to offer.
                Raspberry and Goat Cheese Cheesecake

                Raspberry and Goat Cheese Cheesecake

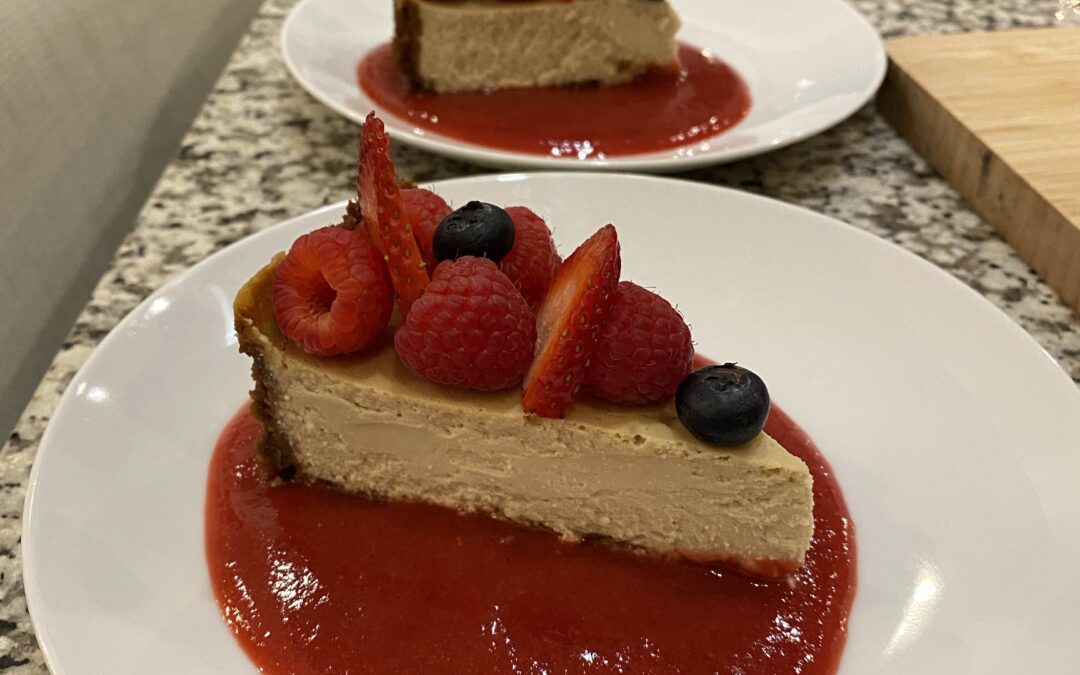
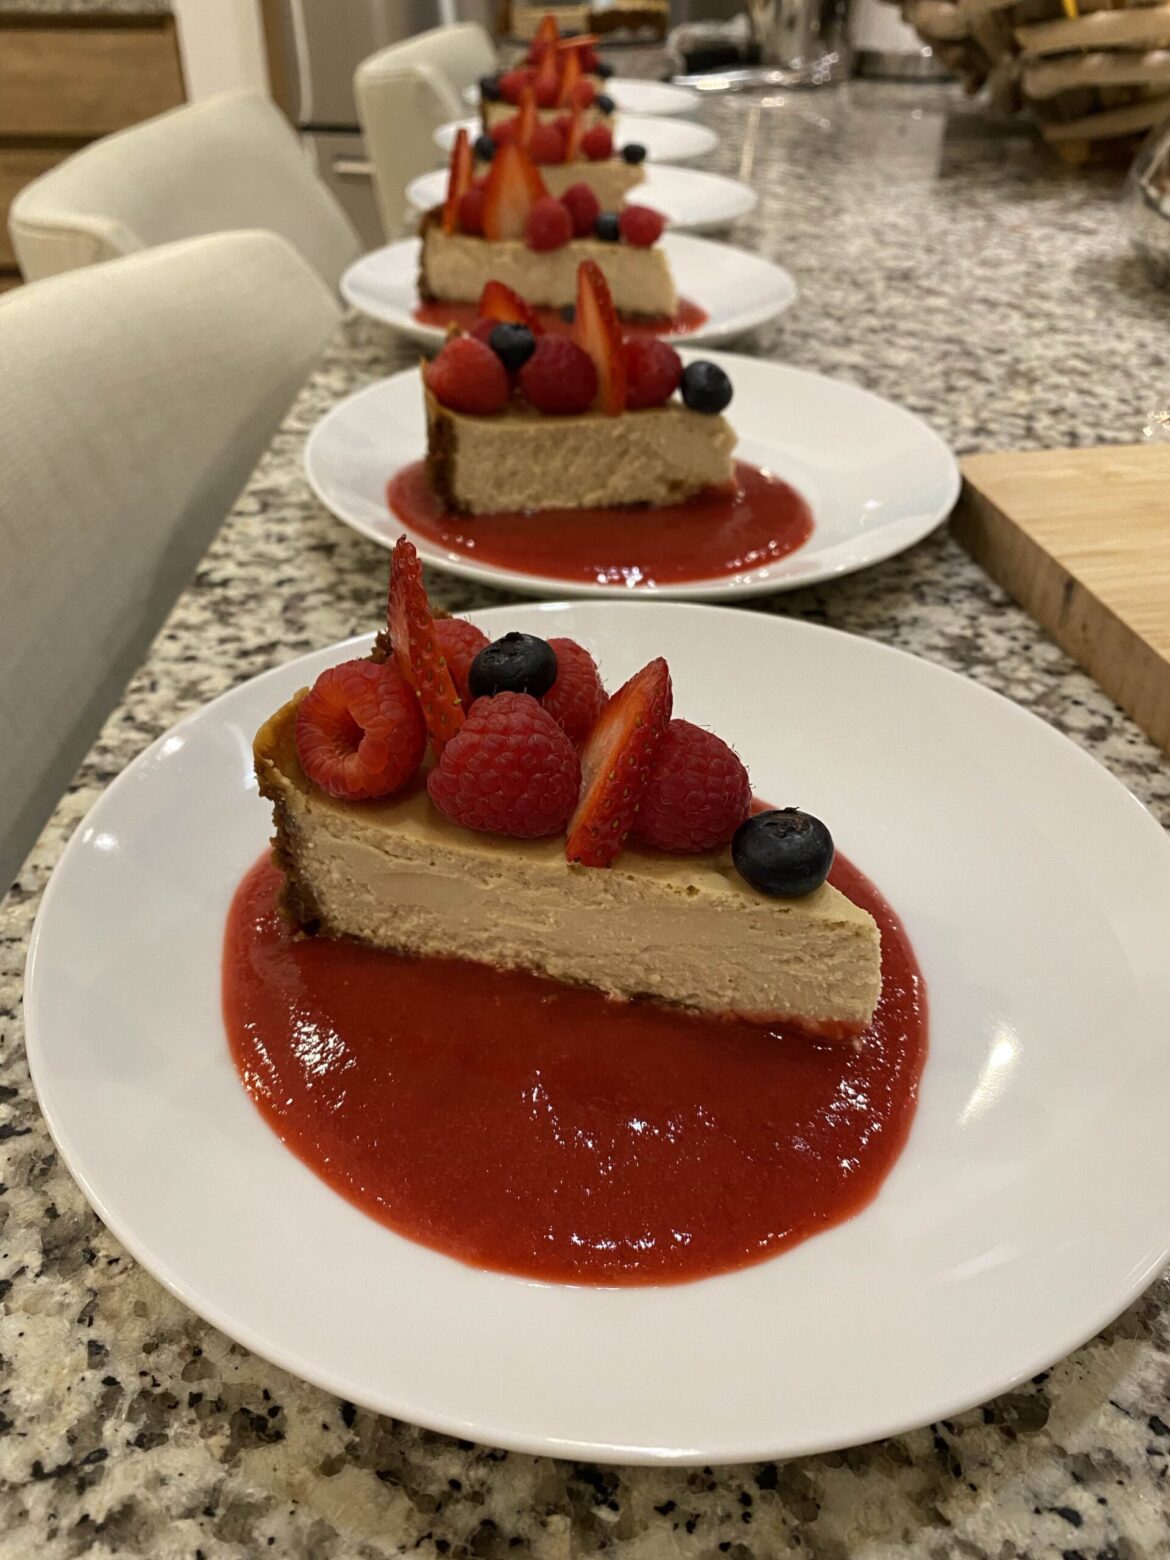
                Raspberry and Goat Cheese Cheesecake Extravaganza

                As the warm rays of the morning sun dance through your kitchen window, there’s a feeling in the air—a whisper of excitement, a promise of something extraordinary about to unfold. Today, we embark on a culinary journey that intertwines the tangy allure of goat cheese with the sweet embrace of ripe raspberries. Welcome to the realm of Raspberry and Goat Cheese Cheesecake—a decadent symphony of flavors that will captivate your taste buds and leave you yearning for more.

                The Art of Preparation

                Every masterpiece begins with its raw materials, and our cheesecake is no exception. Picture yourself amidst a bustling market, selecting the finest ingredients with care and consideration. From the creamy richness of Philadelphia cream cheese to the distinctive tang of goat cheese, each component plays a vital role in crafting the perfect harmony of flavors. With a touch of white sugar, a hint of vanilla paste, and the zesty freshness of lime, our stage is set for culinary brilliance. Like a skilled conductor preparing for a symphony, we meticulously assemble our ingredients, ensuring that each note is in perfect harmony. The crust, a foundation of crushed Biscoff cookies infused with the essence of lime zest, forms the backdrop for our culinary masterpiece. With a delicate balance of butter, egg yolk, and brown sugar, it serves as the canvas upon which our flavors will unfold.

                With the stage set and anticipation building, it’s time for our cheesecake to take center stage. As the aroma of freshly baked crust fills the air, we prepare our audience—the creamy mixture of goat cheese, cream cheese, sour cream, and eggs, infused with the bright flavors of lime zest and juice. With precision and care, we pour this exquisite blend into our cooled crust, ready to embark on a journey of transformation.

                As our cheesecake basks in the warmth of the oven, a sense of anticipation fills the room. Like a crescendo building to its peak, we wait with bated breath as flavors meld and textures meld into perfection. After 40 minutes of tender nurturing, our creation emerges—a vision of beauty, with a slight jiggle at its center signaling its readiness to be savored.

                Raspberry and Goat Cheese Cheesecake

                Cook Time 45 minutes
                Total Time 45 minutes

                Ingredients
                  

                Ingredients:

                • o 300g goat cheese.
                • o 300g Philadelphia cream cheese.
                • o 130g white sugar.
                • o 1 teaspoon vanilla paste.
                • o 113g sour cream.
                • o 4 eggs.
                • o Zest of 1 lime.
                • o 28g lime juice.

                Crust:

                Ingredients:

                • o 1 package of crushed Biscoff cookies.
                • o Lime zest.
                • o 3 tablespoons butter.
                • o 1 egg yolk.
                • o 2 tablespoons brown sugar.

                Instructions
                 

                Instructions:

                • Mix all ingredients together until there are no lumps. If there are lumps, strain the mixture.
                • Let the mixture rest.

                Crust:

                  Instructions:

                  • Prepare a cheesecake/tart pan by greasing it with butter and lining it with parchment paper.
                  • Mix all ingredients together and spread the mixture evenly in the pan, covering the base and sides halfway up.
                  • Bake for 10 minutes at 325°F.
                  • Let cool.
                  • Pour the cheesecake mixture into the cooled crust (cover the pan with plastic wrap and then with aluminum foil).
                  • Bake in a water bath in a preheated oven at 350°F.
                  • Bake for 40 minutes or until the center has a slight jiggle.
                  • Let cool overnight.

                  A Culinary Crescendo

                  As the final notes of our culinary symphony linger in the air, it’s time to indulge in the fruits of our labor. With each velvety bite, the tang of goat cheese dances in harmony with the sweetness of ripe raspberries, creating a sensory experience that is nothing short of sublime. With each forkful, we savor not just a dessert, but a masterpiece—a testament to the joys of creativity and the artistry of flavor.

                  So, dear reader, as you embark on your own culinary adventures, remember the tale of Raspberry and Goat Cheese Cheesecake—a story of passion, precision, and the sheer delight of indulgence. May it inspire you to create, to innovate, and to savor each moment, one delicious bite at a time.

                  Bon appétit!

                  Are you interested in learning more?

                  Follow topics related to recipes on our newsletter or instagram.

                  Join our

                  Newsletter

                  To stay in the loop, we invite you to sign up for our newsletter. By doing so, you will receive regular updates straight to your inbox, keeping you informed of everything Mo.Bo. Cabo has to offer.
                  Vanilla and Passionfruit Tart

                  Vanilla and Passionfruit Tart

                  Crafting the Perfect Vanilla and Passionfruit Tart

                  As the warm sun paints the sky in hues of orange and pink, there’s an undeniable allure to the idea of indulging in a sweet treat that embodies the essence of summer. Picture yourself in a quaint French patisserie, the aroma of freshly baked pastries teasing your senses as you gaze upon a display of vibrant tarts, each one a masterpiece of flavor waiting to be savored. Among them, a Vanilla and Passionfruit Tart stands out, beckoning you with its delicate crust and tantalizing filling.

                  Let’s embark on a culinary journey to recreate this exquisite dessert, starting with the foundation: the crust. The sable crust, with its buttery richness and subtle almond undertones, sets the stage for the symphony of flavors that is to follow.

                  In a dance of precision and creativity, we begin by sifting together all-purpose flour, powdered sugar, almond flour, and a pinch of salt. As the ingredients cascade like soft snowflakes in a winter breeze, we grate cold butter into the mixture, gently coaxing it into a sandy texture that promises melt-in-your-mouth goodness. With a deft hand, we introduce a single egg, blending until just unified, careful not to overwork the dough, lest we disrupt its delicate balance. With parchment paper as our canvas, we roll out the dough, shaping it into a perfect square, a testament to the meticulous craftsmanship that defines French pastry artistry.

                  Now, let’s turn our attention to the pièce de résistance: the filling. A velvety custard infused with the essence of vanilla and the bright tang of passionfruit awaits its moment to shine. In a symphony of simplicity and sophistication, we combine milk, vanilla extract, a pinch of salt, granulated sugar, egg yolks, and a hint of passionfruit syrup in a saucepan, allowing them to mingle and meld over a gentle flame. With each stir, the mixture thickens, transforming into a luscious custard that tantalizes the taste buds and warms the soul.

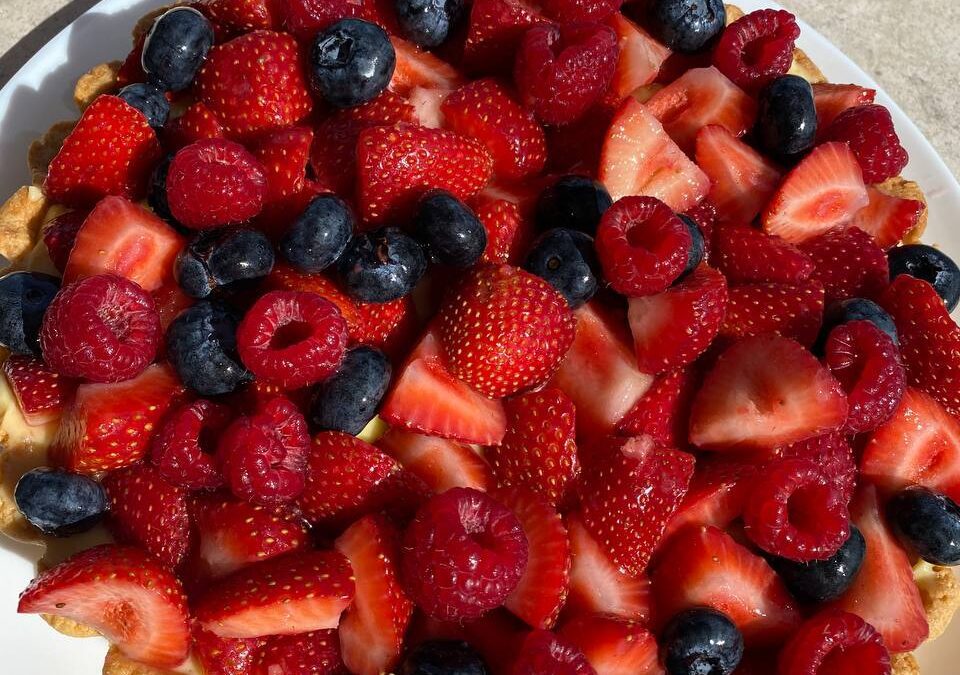
                  As the custard coats the back of a spoon, we remove it from the heat, allowing it to cool ever so slightly before incorporating cold butter, a final flourish that adds a luxurious sheen to the filling. With our crust patiently waiting, we pour the velvety custard atop its golden surface, spreading it with care and precision. And now, for the pièce de résistance, we adorn our tart with a kaleidoscope of fresh fruits – strawberries, blueberries, perhaps even a sprinkle of passionfruit seeds – each one a burst of color and flavor that elevates this dessert to new heights of culinary artistry.

                  Vanilla and Passionfruit Tart

                  Cook Time 30 minutes

                  Ingredients
                    

                  Crust:

                  Sable:

                  Ingredients:

                  • o 240g all-purpose flour.
                  • o 95g powdered sugar.
                  • o 90g almond flour.
                  • o Pinch of salt.
                  • o 120g cold grated butter.
                  • o 1 whole egg.

                  Filling:

                  Ingredients:

                  • o 2 cups milk.
                  • o 1 tsp vanilla extract.
                  • o Pinch of salt.
                  • o 100g granulated sugar.
                  • o 5 egg yolks.
                  • o 30g cornstarch.

                  Instructions
                   

                  Crust:

                    Sable:

                      Instructions:

                      • Sift all the dry ingredients.
                      • Beat cold grated butter until it looks like sand.
                      • Add the egg. Mix until just combined, do not overwork the dough.
                      • On a sheet of parchment paper, roll out the dough into a square shape.

                      Filling:

                        Instructions:

                        • Mix sugar, egg yolks, and passionfruit syrup in a saucepan over low heat.
                        • Cook the mixture until thickened, stirring constantly to avoid scrambling the eggs.
                        • Once the mixture is thick, remove from heat. Let it cool slightly, then add the cold butter.
                        • Cover with plastic wrap and refrigerate.
                        • Spread the filling on top of the crust and decorate with fruits such as strawberries, blueberries, etc.

                        Capturing the Essence of Summer in Every Bite

                        As you take your first bite, the crispness of the crust gives way to the creamy richness of the filling, punctuated by the bright acidity of the passionfruit and the subtle sweetness of vanilla. With each subsequent bite, you’re transported to sun-drenched orchards and lazy afternoons spent indulging in life’s simple pleasures.

                        So, dear reader, I invite you to embrace the spirit of summer and treat yourself to the exquisite delight that is the Vanilla and Passionfruit Tart. With each bite, savor the artistry, the craftsmanship, and the undeniable joy that comes from a truly decadent dessert. Cheers to summer and the simple joys it brings!

                        Are you interested in learning more?

                        Follow topics related to recipes on our newsletter or instagram.

                        Join our

                        Newsletter

                        To stay in the loop, we invite you to sign up for our newsletter. By doing so, you will receive regular updates straight to your inbox, keeping you informed of everything Mo.Bo. Cabo has to offer.
                        Tiramisu

                        Tiramisu

                        Indulge in Decadence: Homemade Tiramisu Recipe

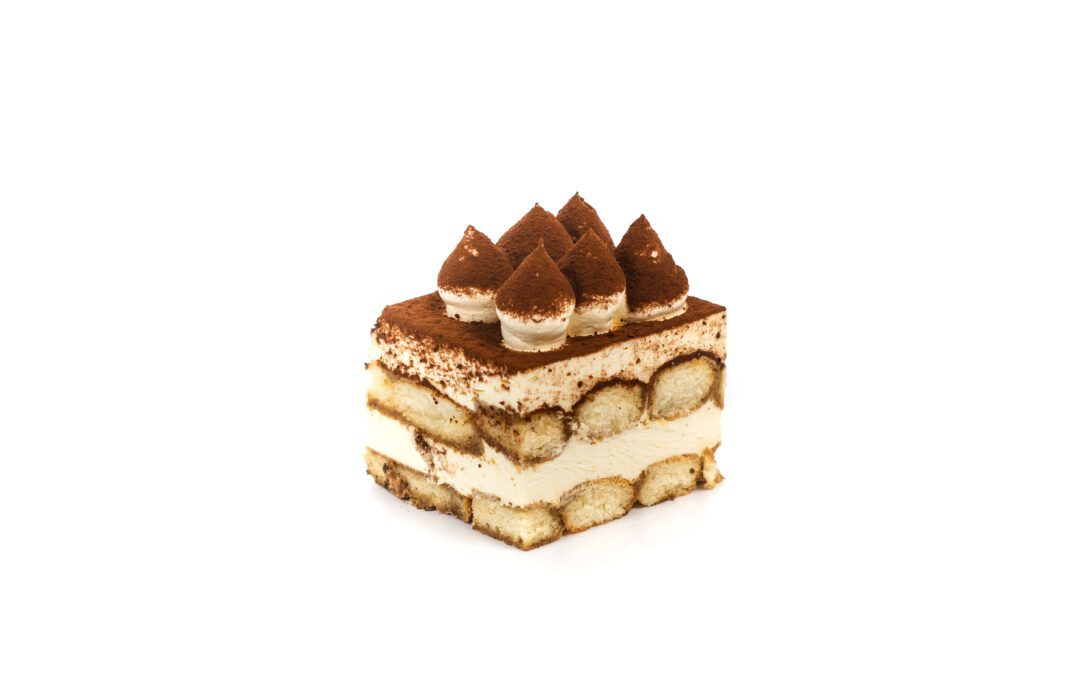
                        In the realm of desserts, few can rival the allure of tiramisu. Its name, which translates to “pick me up,” aptly describes the experience it offers – a delightful lift to the senses with every decadent bite. Today, I invite you to embark on a culinary journey with me as we delve into the art of crafting the perfect tiramisu.

                        The Art of Preparation

                        Our adventure begins with the foundation of this iconic dessert – the coffee syrup. Picture this: rich, robust coffee infused with a hint of sweetness from sugar and a subtle kick from amaretto. It’s the essence of Italian coffee culture captured in a simple yet essential component of our tiramisu. Next, we turn our attention to the heart and soul of this dessert – the mascarpone cream. Here, creamy mascarpone cheese takes center stage, complemented by the delicate sweetness of egg yolks, the aromatic warmth of vanilla bean, and a touch of richness from heavy cream. As these ingredients come together, they form a velvety canvas upon which the rest of our tiramisu masterpiece will unfold.

                        But what is tiramisu without a touch of indulgence? Enter the coffee ganache, a luxurious blend of cream, white chocolate, and coffee essence. With each luscious spoonful, it adds a layer of depth and sophistication to our dessert, elevating it to new heights of culinary excellence.

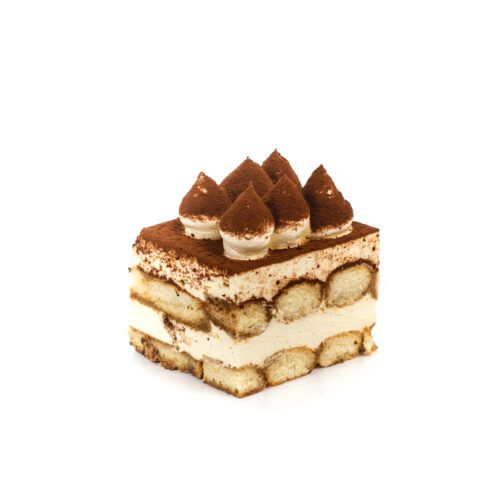
                        Now, it’s time for the pièce de résistance – the assembly. With practiced hands and an eye for detail, we carefully layer our tiramisu, each element building upon the last to create a symphony of flavors and textures. The ladyfingers, delicately dipped in our coffee syrup, provide a sturdy foundation for the creamy mascarpone and the indulgent coffee ganache. Grated dark chocolate, sprinkled between each layer, adds a welcome contrast, both in taste and in visual appeal.

                        Tiramisu

                        Cook Time 30 minutes

                        Ingredients
                          

                        Coffee Syrup:

                        Ingredients:

                        • o 200g strong coffee.
                        • o 28g sugar.
                        • o 40g amaretto.

                        Mascarpone Cream:

                        Ingredients:

                        • o 240g Lyncott or Nestle cream.
                        • o 400g mascarpone cheese.
                        • o 100g egg yolks.
                        • o 1 vanilla bean.
                        • o 80g heavy cream.
                        • o 80g sugar.
                        • o 4.75 sheets of gelatin optional.

                        Coffee Ganache:

                        Ingredients:

                        • o 170g Lyncott or Nestle cream.
                        • o 100g white chocolate.
                        • o 10g strong coffee grounds.
                        • o 1 tablespoon of coffee extract.

                        Mascarpone Cream:

                        Ingredients:

                        • o 190g mascarpone cheese.
                        • o 50g egg whites.
                        • o 35g sugar.
                        • o 30g egg yolks.
                        • o 35g sugar.

                        Instructions
                         

                        Coffee Syrup:

                          Instructions:

                          • Mix all ingredients together and set aside.

                          Mascarpone Cream:

                            Instructions:

                            • In a bowl over a double boiler, whisk egg yolks and sugar until they become a light-yellow color.
                            • Remove from heat and let cool. Mix with mascarpone cheese.
                            • In a separate bowl, whisk 50g of egg whites and 30g of sugar to form stiff peaks. Gently fold both mixtures together.

                            Coffee Ganache:

                              Instructions:

                              • In a saucepan over low heat, mix coffee grounds and cream.
                              • Once mixed, add white chocolate and stir until melted.

                              Mascarpone Cream:

                                Instructions:

                                • In a bowl over a double boiler, whisk egg yolks and sugar until they become a light-yellow color.

                                Notes

                                Assembly:
                                1. Dip ladyfingers in coffee syrup for less than 5 seconds and layer on the bottom of a dish. Spread mascarpone cream on top. Repeat this process for at least 4 layers (grate dark chocolate between each layer for added flavor).
                                2. Once finished, pipe coffee ganache on top using a piping bag.
                                3. Pipe mascarpone cream on top of the coffee ganache.
                                4. Decorate with cocoa powder as desired.

                                A Journey to Tiramisu Bliss

                                As the final flourish, we dust our tiramisu with cocoa powder, a nod to its Italian heritage and a reminder of the exquisite pleasures that await. With every slice served, we share not just a dessert, but a moment of pure bliss – a moment to savor and cherish with loved ones.

                                In conclusion, tiramisu is more than just a dessert; it’s a celebration of life’s simple joys and a testament to the beauty of Italian cuisine. So, whether you’re an experienced chef or a novice in the kitchen, I encourage you to embark on your own tiramisu journey. With a bit of patience, a dash of creativity, and a whole lot of love, you too can experience the magic of this timeless classic. Buon appetito!

                                Are you interested in learning more?

                                Follow topics related to recipes on our newsletter or instagram.

                                Join our

                                Newsletter

                                To stay in the loop, we invite you to sign up for our newsletter. By doing so, you will receive regular updates straight to your inbox, keeping you informed of everything Mo.Bo. Cabo has to offer.